Raspberry Pi Console Server
Out of band remote console access to devices can be incredibly useful as it continues to work no matter what configuration (or lack of configuration) is present on the device. Remote console access can easily be achieved, with some inexpensive hardware and a Raspberry Pi.
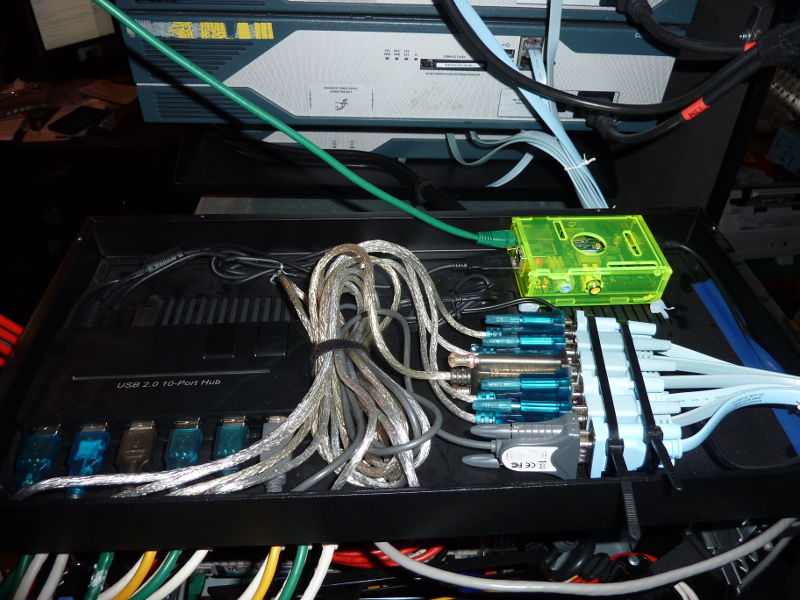
Hardware Requirements
Option 1 - using single USB to Serial adapters
- Raspberry Pi Model B or B+ with 4GB SD card
- USB Hub (Powered)
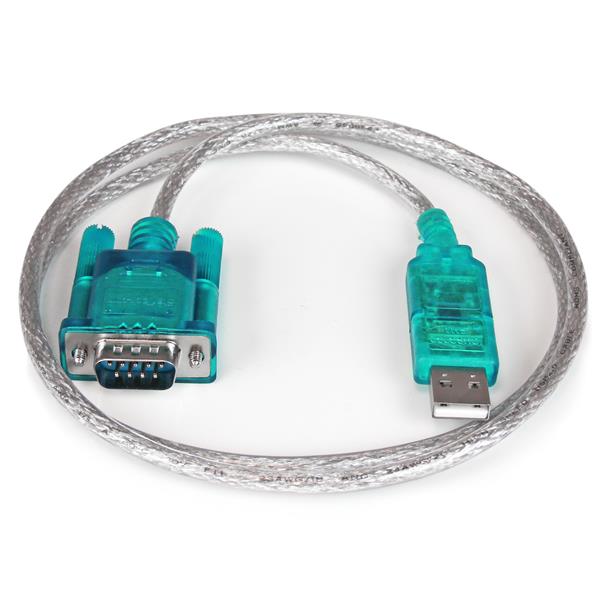
- USB to Serial adapters (one for each console connection)
- USB cable - A to Micro B (to power Pi)
- Cisco console/rollover cables (one for each console connection)
- Ethernet cable
Option 2 - using single USB to multiple Serial adapters

- Raspberry Pi Model B or B+ with 4GB SD card
- USB to multiple Serial adapter
- USB cable - A male to Micro B male
- Power supply (1 Amp @ 5V or greater)
- Cisco console/rollover cables (one for each console connection)
- Ethernet cable
Optional for 1 & 2
- Rack-mount 1U case
- Raspberry Pi case
Deciding what hardware to use
I decided on, and would recommend, option 1 for the following reasons:
- USB to single serial cables are cheap, really cheap (approx £2 on eBay) vs approx £25 for a USB to 4 serial ports cable.
- Including a USB powered hub in the design eliminates the need for a separate PSU as the Pi can be powered from the hub.
- Having a USB hub allows greater flexibility to later add a multitude of USB devices to the Pi (Wifi dongles, Flash drives, USB to Ethernet adapters, etc.)
Hardware Installation
After some research I opted for the following hardware based on my requirements for at least 6 console connections:
- 1 x Raspberry Pi model B (£25 from CPC Farnell) with 16GB SD card (£10 ebuyer)
- 1 x 10 port Pro Signal PSG90593 2.5A PSU should be more than adequate (£20 from CPC Farnell)
- 6 x generic USB to serial cables (circa £2 on eBay)
- 1 x generic 1U rack box (eBay auction score, £5 delivered!)
- USB A to Micro USB B cable (already had)
- Ethernet cable (already had)
Total cost comes in around £75 for the console server setup. Given the Pi is running Linux, additional services can be configured to get even more use from the hardware.
The hardware installed in the 1U rack box.
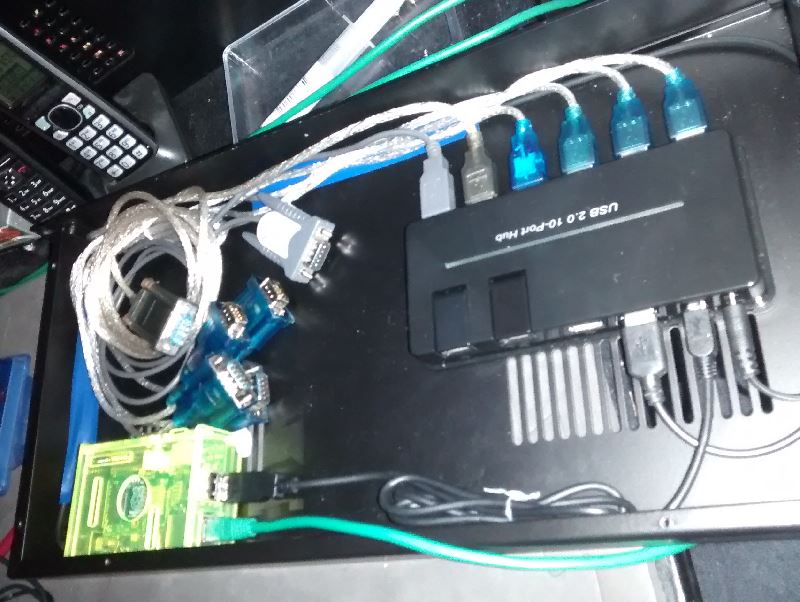
Blu-tack was used to hold the Pi and Hub in place allowing for easy alterations to be made later. Some basic cable management was done to neaten things up a little. The USB hubs up-link port is plugged to one of the Pi’s USB ports and another of the hubs USB port provides power to the Pi. 4 free USB ports (1 on the Pi and 3 on the hub) are available for further expansion.
Software Installation
The following assumes Rasbian Linux is already installed on the Pi with SSH access.
ser2net is a program that proxies TCP connections to serial ports on the Pi. ser2net is available in the default Rasbian repositories.
Install ser2net:
pi@pi01 ~ $ sudo apt-get install ser2net
Reading package lists... Done
Building dependency tree
Reading state information... Done
The following NEW packages will be installed:
  ser2net
0 upgraded, 1 newly installed, 0 to remove and 1 not upgraded.
Need to get 0 B/51.9 kB of archives.
After this operation, 89.1 kB of additional disk space will be used.
Selecting previously unselected package ser2net.
(Reading database ... 105492 files and directories currently installed.)
Preparing to unpack .../ser2net_2.9.1-1_armhf.deb ...
Unpacking ser2net (2.9.1-1) ...
Processing triggers for man-db (2.7.0.2-5) ...
Processing triggers for systemd (215-17+deb8u7) ...
Setting up ser2net (2.9.1-1) ...
Now we need to determine to which lines our USB to serial adapters are connected (a mixture of USB to serial cables were used hence the different chip sets listed):
pi@pi01 ~ $ dmesg | grep ttyUSB
[   14.448749] usb 1-1.3.5: ch341-uart converter now attached to ttyUSB0
[   14.488864] usb 1-1.3.6: ch341-uart converter now attached to ttyUSB1
[   14.521964] usb 1-1.3.7.2: ch341-uart converter now attached to ttyUSB2
[   14.561924] usb 1-1.3.7.3: ch341-uart converter now attached to ttyUSB3
[   14.598247] usb 1-1.3.7.4: ch341-uart converter now attached to ttyUSB4
[   14.958674] usb 1-1.3.7.1: pl2303 converter now attached to ttyUSB5
ser2net could be configured to use the /dev/ttyUSB# device names however these are not stable and can change on each boot as they are assigned in the order the kernel discovers the USB deices.
udev rules can be created to assign aliases to each USB serial adapter and ser2net can then be configured using these aliases to obtain a persistent configuration.
Creating udev rules
Writing udev rules for the USB to serial adapters is a little tricky because they are connected to the Pi through a USB hub so they all get assigned the same serial number:
pi@pi01 ~ $ for i in {0..5}; do udevadm info -a -n /dev/ttyUSB$i | grep -i "KERNEL\|{Serial}"; echo -e "\n" ; done KERNEL=="ttyUSB0"
ATTRS{serial}=="20980000.usb"


KERNEL=="ttyUSB1"
ATTRS{serial}=="20980000.usb"


KERNEL=="ttyUSB2"
ATTRS{serial}=="20980000.usb"


KERNEL=="ttyUSB3"
ATTRS{serial}=="20980000.usb"


KERNEL=="ttyUSB4"
ATTRS{serial}=="20980000.usb"


KERNEL=="ttyUSB5"
ATTRS{serial}=="20980000.usb"
The above bash “one-liner” looped through the 6 ttyUSB# devices and preformed an attribute walk using udevadm, results were filtered to show only the dev name assigned by the kernel and device serial number (hubs serial number).
Fortunately the KERNELS== udev attribute appears to show which port of the USB hub each device is plugged into allowing udev rules to be written to identify each USB to serial adapter and assign a persistent alias to it (so long as the adapters remain plugged into the same ports on the hub).
pi@pi01 ~ $ for i in {0..5}; do udevadm info -a -n /dev/ttyUSB$i | grep -i "KERNEL==\|{Serial}"; echo -e "\n" ; done
KERNEL=="ttyUSB0"
KERNELS=="ttyUSB0"
KERNELS=="1-1.3.5:1.0"
KERNELS=="1-1.3.5"
KERNELS=="1-1.3"
KERNELS=="1-1"
KERNELS=="usb1"
ATTRS{serial}=="20980000.usb"
KERNELS=="20980000.usb"
KERNELS=="soc"
KERNELS=="platform"


KERNEL=="ttyUSB1"
KERNELS=="ttyUSB1"
KERNELS=="1-1.3.6:1.0"
KERNELS=="1-1.3.6"
KERNELS=="1-1.3"
KERNELS=="1-1"
KERNELS=="usb1"
ATTRS{serial}=="20980000.usb"
KERNELS=="20980000.usb"
KERNELS=="soc"
KERNELS=="platform"


KERNEL=="ttyUSB2"
KERNELS=="ttyUSB2"
KERNELS=="1-1.3.7.2:1.0"
KERNELS=="1-1.3.7.2"
KERNELS=="1-1.3.7"
KERNELS=="1-1.3"
KERNELS=="1-1"
KERNELS=="usb1"
ATTRS{serial}=="20980000.usb"
KERNELS=="20980000.usb"
KERNELS=="soc"
KERNELS=="platform"


KERNEL=="ttyUSB3"
KERNELS=="ttyUSB3"
KERNELS=="1-1.3.7.3:1.0"
KERNELS=="1-1.3.7.3"
KERNELS=="1-1.3.7"
KERNELS=="1-1.3"
KERNELS=="1-1"
KERNELS=="usb1"
ATTRS{serial}=="20980000.usb"
KERNELS=="20980000.usb"
KERNELS=="soc"
KERNELS=="platform"


KERNEL=="ttyUSB4"
KERNELS=="ttyUSB4"
KERNELS=="1-1.3.7.4:1.0"
KERNELS=="1-1.3.7.4"
KERNELS=="1-1.3.7"
KERNELS=="1-1.3"
KERNELS=="1-1"
KERNELS=="usb1"
ATTRS{serial}=="20980000.usb"
KERNELS=="20980000.usb"
KERNELS=="soc"
KERNELS=="platform"


KERNEL=="ttyUSB5"
KERNELS=="ttyUSB5"
KERNELS=="1-1.3.7.1:1.0"
KERNELS=="1-1.3.7.1"
KERNELS=="1-1.3.7"
KERNELS=="1-1.3"
KERNELS=="1-1"
KERNELS=="usb1"
ATTRS{serial}=="20980000.usb"
KERNELS=="20980000.usb"
KERNELS=="soc"
KERNELS=="platform"
Create the following udev rules to assign aliases:
pi@pi01 ~ $ sudo nano /etc/udev/rules.d/99-user.rules
SUBSYSTEM=="tty", KERNEL=="ttyUSB*", KERNELS=="1-1.3.7.1", SYMLINK+="Cisco_3850-1"
SUBSYSTEM=="tty", KERNEL=="ttyUSB*", KERNELS=="1-1.3.7.2", SYMLINK+="Cisco_2851-1"
SUBSYSTEM=="tty", KERNEL=="ttyUSB*", KERNELS=="1-1.3.7.3", SYMLINK+="Cisco_2851-2"
SUBSYSTEM=="tty", KERNEL=="ttyUSB*", KERNELS=="1-1.3.7.4", SYMLINK+="Cisco_1841-1"
SUBSYSTEM=="tty", KERNEL=="ttyUSB*", KERNELS=="1-1.3.5", SYMLINK+="Cisco_1841-2"
SUBSYSTEM=="tty", KERNEL=="ttyUSB*", KERNELS=="1-1.3.6", SYMLINK+="Cisco_1841-3"
After rebooting the Pi check that the aliases are assigned correctly:
pi@pi01 ~ $ ls -al /dev/Cisco_*
lrwxrwxrwx 1 root root 7 Apr 17 15:34 /dev/Cisco_1841-1 -> ttyUSB5
lrwxrwxrwx 1 root root 7 Apr 17 15:34 /dev/Cisco_1841-2 -> ttyUSB0
lrwxrwxrwx 1 root root 7 Apr 17 15:34 /dev/Cisco_1841-3 -> ttyUSB1
lrwxrwxrwx 1 root root 7 Apr 17 15:34 /dev/Cisco_2851-1 -> ttyUSB3
lrwxrwxrwx 1 root root 7 Apr 17 15:34 /dev/Cisco_2851-2 -> ttyUSB4
lrwxrwxrwx 1 root root 7 Apr 17 15:34 /dev/Cisco_3850-1 -> ttyUSB2
Configure ser2net
The USB to serial adapters are now addressable under persistent device aliases, these aliases can be used in the ser2net configuration file:
pi@pi01 ~ $ sudo nano /etc/ser2net.conf
Add the following lines to create a distinct banner for each device and configure each console connection.
Each serial port is configured with the standard Cisco settings:
Bits per sec    :  9600
Data bits       :     8
Parity          :  none
Stop bits       :     1
Flow control    :  none
1 2 3 4 5 6 7 8 9 10 11 12 13 14 15 | TRACEFILE:tr1:/var/log/ser2net/tr-\p-\Y-\M-\D-\H:\i:\s
BANNER:banner_3850-1:\r\nser2net port \p device \d [\s] (Cisco 3850-1 PoE Switch)\r\n\r\n
BANNER:banner_2851-1:\r\nser2net port \p device \d [\s] (Cisco 2851-1 ISR Router + eswitch module)\r\n\r\n
BANNER:banner_2851-2:\r\nser2net port \p device \d [\s] (Cisco 2851-2 ISR Router + eswitch module)\r\n\r\n
BANNER:banner_1841-1:\r\nser2net port \p device \d [\s] (Cisco 1841-1 Router)\r\n\r\n
BANNER:banner_1841-2:\r\nser2net port \p device \d [\s] (Cisco 1841-2 Router)\r\n\r\n
BANNER:banner_1841-3:\r\nser2net port \p device \d [\s] (Cisco 1841-3 Router)\r\n\r\n
5000:telnet:0:/dev/Cisco_3850-1:9600 8DATABITS NONE 1STOPBIT banner_3850-1 tr=tr1 timestamp
5001:telnet:0:/dev/Cisco_2851-1:9600 8DATABITS NONE 1STOPBIT banner_2851-1 tr=tr1 timestamp
5002:telnet:0:/dev/Cisco_2851-2:9600 8DATABITS NONE 1STOPBIT banner_2851-2 tr=tr1 timestamp
5003:telnet:0:/dev/Cisco_1841-1:9600 8DATABITS NONE 1STOPBIT banner_1841-1 tr=tr1 timestamp
5004:telnet:0:/dev/Cisco_1841-2:9600 8DATABITS NONE 1STOPBIT banner_1841-2 tr=tr1 timestamp
5005:telnet:0:/dev/Cisco_1841-3:9600 8DATABITS NONE 1STOPBIT banner_1841-3 tr=tr1 timestamp
|
Line 1: Creates a template to use for logging commands typed in each console session locally on the Pi. Log files are saved to /var/log/ser2net/ under the file name “tr-<PORT_NUM>-<DATE>-<TIME>”
The placeholders above will ensure session logs don’t overwrite one another and their file names properly reference the port number and time the session commenced. \P= port, \Y = 4 digit year, \M = Month short, \D = day (numeric), \H = hour, \i = minute and \s = second.
Create the directory structure for session log files:
pi@pi01 ~ $ pi@pi01 /tmp $ sudo mkdir /var/log/ser2net
Lines 3-8: create a banner that identifies the device being connected to.
#  BANNER::banner
#    This will create a banner, if the banner name is given in the
#    options of a line, that banner will be printed.  This takes the
#    standard "C" \x characters (\r is carraige return, \n is newline,
#    etc.).  It also accepts \d, which prints the device name, \p,
#    which prints the TCP port number, and \s which prints the serial
#    parameters (eg 9600N81).  Banners can span lines if the last
#    character on a line is '\'.  Note that you *must* use \r\n to
#    start a new line.
Lines 10-15: Configure ser2net to listen on port 500X and bridge telnet connections to the respective device by its alias. The serial connection parameters (data rate, stop bits, etc.) are also set as mentioned above. “tr=tr1” is also set to enable logging in the preciously defined format
# This is the configuration file for ser2net. It has the following format: #: : : : # TCP port # Name or number of the TCP/IP port to accept con- # nections from for this device. A port number may # be of the form [host,]port, such as 127.0.0.1,2000 # or localhost,2000. If this is specified, it will # only bind to the IP address specified. Otherwise # it will bind to all the ports on the machine. # # state Either raw or rawlp or telnet or off. off disables # the port from accepting connections. It can be # turned on later from the control port. raw enables # the port and transfers all data as-is between the # port and the long. rawlp enables the port and # transfers all input data to device, device is open # without any termios setting. It allow to use # /dev/lpX devices and printers connected to them. # telnet enables the port and runs the telnet proto- # col on the port to set up telnet parameters. This # is most useful for using telnet. # # timeout # The time (in seconds) before the port will be dis- # connected if there is no activity on it. A zero # value disables this funciton. # # device The name of the device to connect to. This # must be in the form of /dev/ . # # options # Sets operational parameters for the serial port. # Options 300, 1200, 2400, 4800, 9600, 19200, 38400, # 57600, 115200 set the various baud rates. EVEN, # ODD, NONE set the parity. 1STOPBIT, 2STOPBITS set # the number of stop bits. 7DATABITS, 8DATABITS set # the number of data bits. [-]XONXOFF turns on (- # off) XON/XOFF support. [-]RTSCTS turns on (- off) # hardware flow control, [-]LOCAL turns off (- on) # monitoring of the modem lines, and # [-]HANGUP_WHEN_DONE turns on (- off) lowering the # modem control lines when the connextion is done. # NOBREAK disables automatic setting of the break # setting of the serial port. # The "remctl" option allow remote control (ala RFC # 2217) of serial-port configuration. A banner name # may also be specified, that banner will be printed # for the line. If no banner is given, then no # banner is printed.
Start and enable ser2net at boot
pi@pi01 ~ $ systemctl start ser2net && systemctl enable ser2net
synchronizing state for ser2net.service with sysvinit using update-rc.d...
Executing /usr/sbin/update-rc.d ser2net defaults
Executing /usr/sbin/update-rc.d ser2net enable
Check with ser2net is listening for connections as configured using netstat
pi@pi01 ~ $ netstat -lntpctive Internet connections (only servers)
Proto Recv-Q Send-Q Local Address           Foreign Address         State       PID/Program name
tcp        0      0 0.0.0.0:5000            0.0.0.0:*               LISTEN      988/ser2net
tcp        0      0 0.0.0.0:5001            0.0.0.0:*               LISTEN      988/ser2net
tcp        0      0 0.0.0.0:5002            0.0.0.0:*               LISTEN      988/ser2net
tcp        0      0 0.0.0.0:5003            0.0.0.0:*               LISTEN      988/ser2net
tcp        0      0 0.0.0.0:5004            0.0.0.0:*               LISTEN      988/ser2net
tcp        0      0 0.0.0.0:5005            0.0.0.0:*               LISTEN      988/ser2net
tcp        0      0 0.0.0.0:22              0.0.0.0:*               LISTEN      621/sshd
tcp6       0      0 :::22                   :::*                    LISTEN      621/sshd
Testing
Telnet to the Pi’s address on the respective port (5000-5005) proxied to the device, in this case a 3560 switch on port 5000. “pi01” is mapped on my local DNS server to the IP address of the Raspberry Pi, the IP address should be substituted for this if DNS is not in use.
chris@dsktop:~$ telnet pi01 5000
Trying 10.0.10.234...
Connected to pi01.
Escape character is '^]'.

ser2net port 5000 device /dev/Cisco_3850-1 [9600 N81] (Cisco 3850-1 PoE Switch)


Switch>enable
Password:
Switch#show ver
Cisco IOS Software, C3560 Software (C3560-ADVIPSERVICESK9-M), Version 12.2(46)SE, RELEASE SOFTWARE (fc2)
The ser2net login banner “ser2net port 5000 device /dev/Cisco_3850-1 [9600 N81] (Cisco 3850-1 PoE Switch)” is displayed over the telnet session and it is possible to login to the switch and run commands as if directly connected to its console port.
The usual Telnet security caveats apply (data is sent in the plain) so only use this setup on a secure LAN or dedicated management VLAN. If accessing the connected devices over the Internet then connecting to the Pi over SSH and then telnet from there to localhost <port_number> to avoid transmitting sensitive data over untrusted networks.
The Finished Console server
Some pictures of the new Raspberry Pi based console server connected up in my home lab rack:
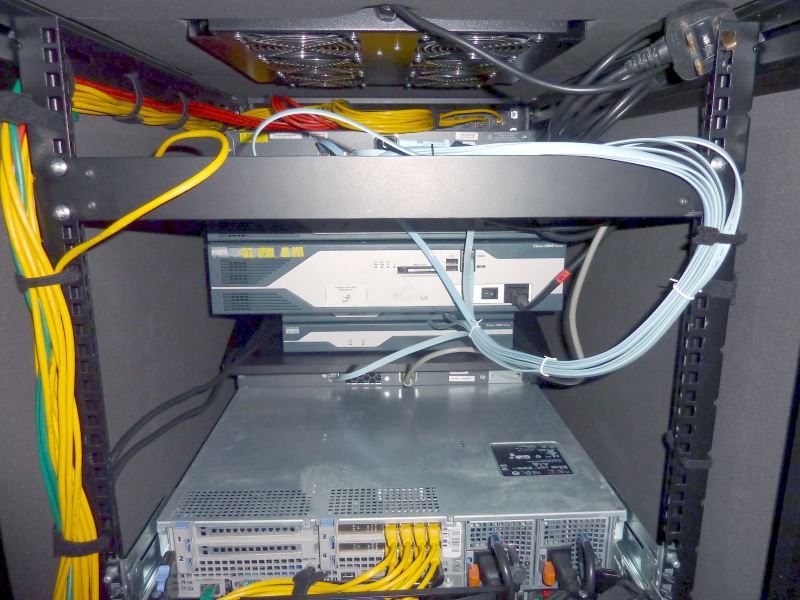
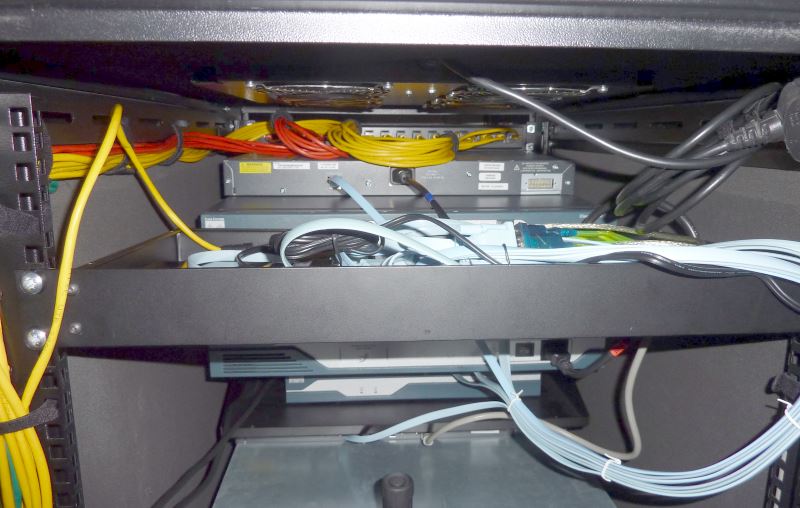
I can now telnet into any of the devices in my Cisco lab from anywhere on my network, or even remotely over VPN.